Create Analysis Areas Based on a New Location File
Upload a File
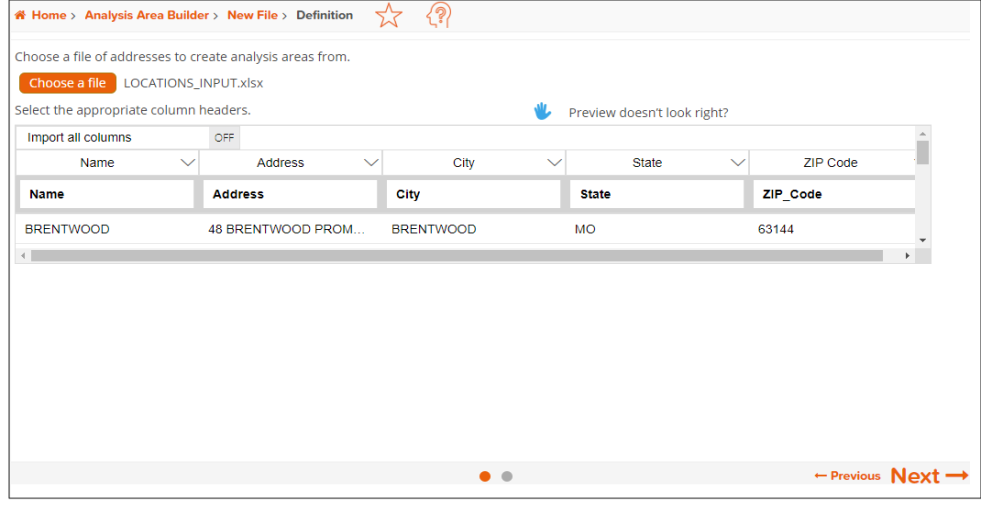
On the New File>Definition screen, click Choose a file and then select the file that you want to upload. When a preview of the selected file appears, you can select the columns that you want to import. After verifying your selections, click Next.

To Learn More:
Analysis Areas, Importing Location File
- On the New File screen, click Choose a file and then select the file that you want to upload. The contents of your selected file appear below.
- If the file preview does not display correctly, click
 and when additional options for updating your file preview appear, specify whether or not the first line of your file is a header by clicking the OFF button, select the field delimiter used in your file, click Update Preview.
If the file preview appears correctly, do the following:- Check each column heading. You can select the columns that you want to import and assign appropriate column headings by clicking the drop-down arrow next to the topmost column heading.
- To import all available column headings, click the OFF button next to Import all columns to set it to ON.
- You can also sort, remove/add columns, and group the columns in your selected file prior to uploading it by hovering and clicking the drop-down arrow next to the column headings of the previewed files.

- After verifying your selections, click Next.