Upload a File
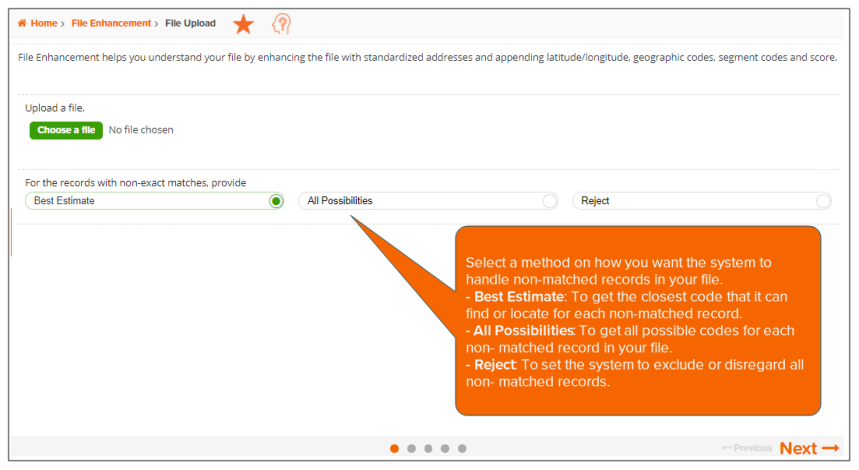
On the File Upload screen, select the file you want to upload, and then specify the method by which you want the system to handle the records that do not have an exact geographic code match.

NOTE: You can review the User Selections pane located to the right of the screen and make sure that it shows your current selections.
To Learn More:
- Click Choose a file and select the file that you want to upload. The contents of your selected file appear below.
- If the file preview does not display correctly, click
 and when additional options for updating your file preview appear, specify whether or not the first line of your file is a header by clicking the OFF button, select the field delimiter used in your file, and then click Update Preview.

If the file preview displays correctly, proceed to the next step.
- Click the down arrow next to each column header and select the appropriate header that matches the displayed content in each column. For example, select Address if the column shows address information.
- Below the For the records with non-exact matches, provide text, click one of the following to specify how you want the system to handle records with no exact geographic code match:
- Best Estimate - To get the closest code that the system can find or locate for each non-matched record
- All Possibilities - To get all possible codes for each non-matched record
- Reject - To exclude or disregard all non-matched records
- Review your selections, and then click Next to proceed.