Analysis Area Builder: Create an Analysis Area Based on a Standard Geography
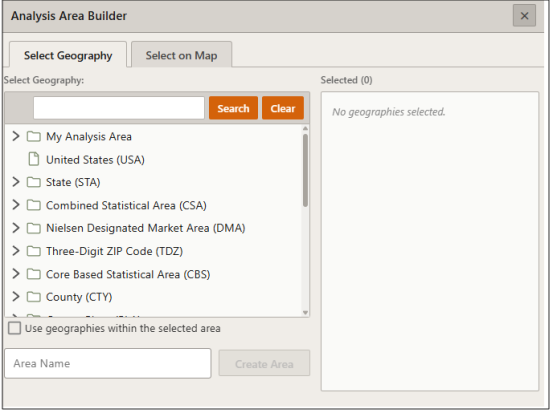
On the Analysis Area Builder - Select Geography pane, select the standard geography(ies) that you want to use to create your analysis area. You may also define the geography level to include as your analysis area within the selected geography and the method by which you want the geography level to be included.
To Learn More:
 View Detailed Steps
- On the Analysis Area Builder - Select Geography pane, select the standard geographies or analysis areas that you want to use.
- (Optional) To specify the geography level to include as your analysis area within the selected geography, perform the following steps:
- check the box next to Use geographies within the selected area. Additional options appear.
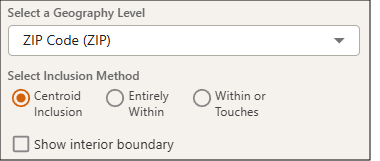
- In the Select a Geography Level drop-down list, select your desired geography level.
- Specify the method by which you want to include the geography. The options are:
- Centroid Inclusion: Includes geographies with centroids that fall within the perimeter of the area.
- Entirely Within: Includes geographies that fall completely within the perimeter of the area.
- Within or Touches: Includes geographies that fall within or touch any part of the perimeter of the area.
- By default, the interior boundaries will not be shown on the map. To show the interior boundaries, check the box next to Show interior boundary.
- (Optional) Enter a name for your analysis area.
- Click Create Area. A message box appears specifying that your analysis area has been saved.
You can also access your saved analysis area by going to My Content.