Location Builder: Append Claritas Segmentation Data
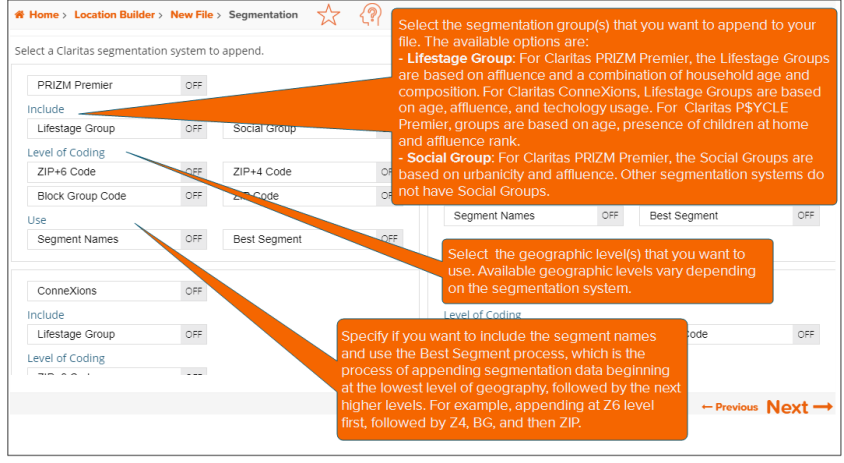
On the Segmentation screen, select the segmentation system and data that you want to append to your uploaded file.
After verifying your selections, click Next.
NOTE: You can review the User Selections pane located to the right of the screen and make sure that it shows your current selections.

To Learn More:
- By default, only the segmentation systems that you license appear on this screen and all buttons are set to OFF. To select the segmentation system(s) that you want to append to your file, click the OFF button next to your desired segmentation system(s). The button setting changes to ON and some options become enabled or selected by default.
- To select the group(s) that you want to append to your file, below Include, click the OFF button next to your desired group(s) . The button setting changes to ON.
- (Optional) To select the level(s) at which you would like to append the selected segmentation data, below Level of Coding, click the OFF button next to your desired geographic level(s).
- (Optional) By default, the Segment Names button is set to ON. If you do not want to include segment names in your output, click the ON button to change it to OFF.
- (Optional) By default, the Best Segments button is set to ON. If you do not want to use the Best Segment process, click the ON button to change it to OFF.
NOTE: The Best Segment process enables the system to append segmentation data beginning at the lowest geography level (i.e., Z6), followed by the next available higher levels (e.g., Z4, BG, and then ZIP).
- Click Next to proceed.